Thread
by ninjavira
GGV IDE first step - create a video synth
Thu, Feb 15 2024 21:41:34
Tutorial 1: GGV2 IDE first step
Introduction We will see step by step how to install GGV IDE and start coding your first synthesizer in vanilla JS. GGV IDE is a dedicated working environment for coding audio effects, video effects, and video synths for GGV 2.
Step 1: Install GGV IDE
Click on the link below to download GGV IDE. Once downloaded, open the GGV IDE folder. You will find the GGV IDE executable file. Click on it to open the GGV IDE.
Step 2: Create a new project
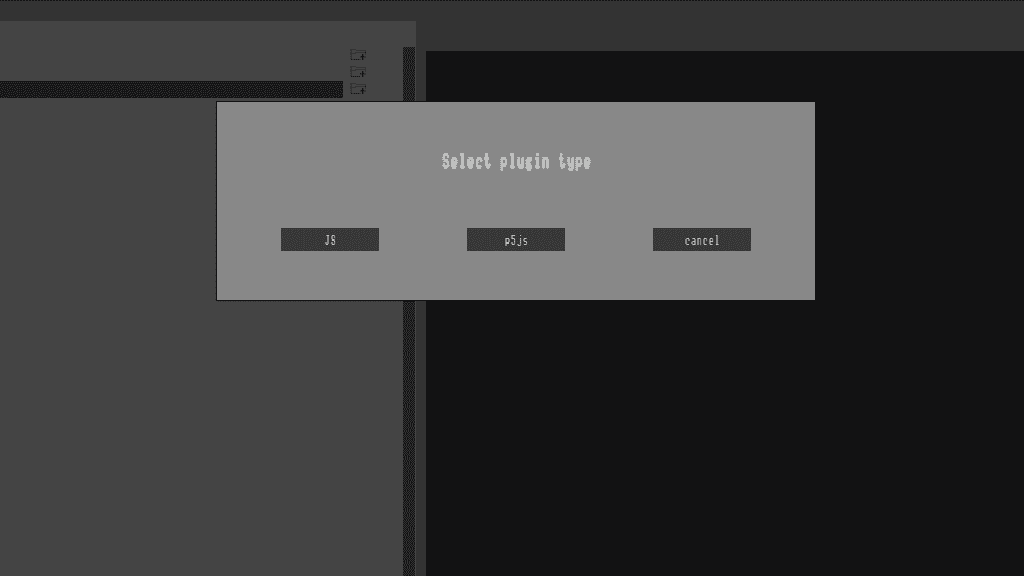
Once GGV IDE is executed and opened, you will have a column on the right with tabs for audiofx, fx, and synth. I will click on the synth tab. 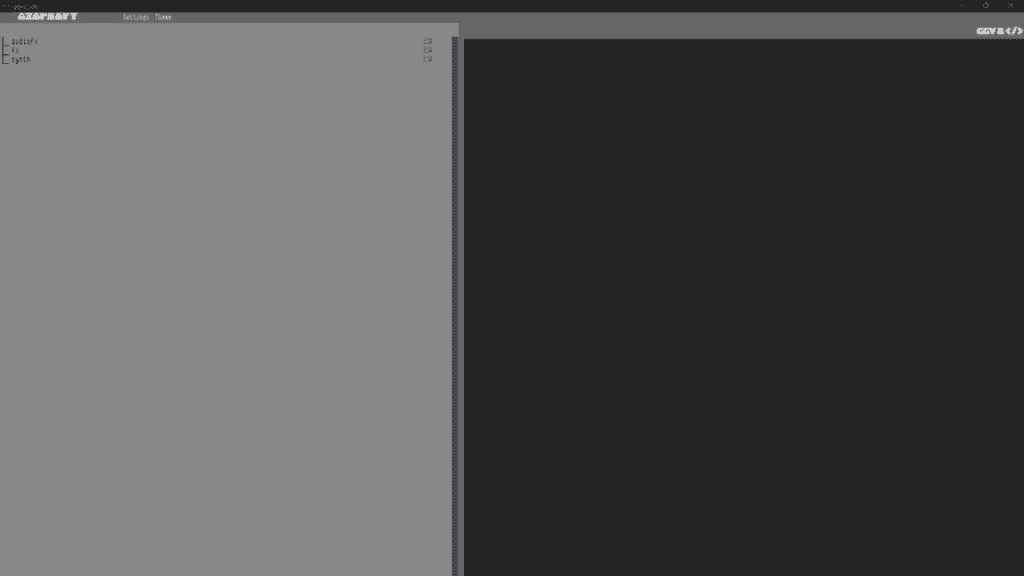
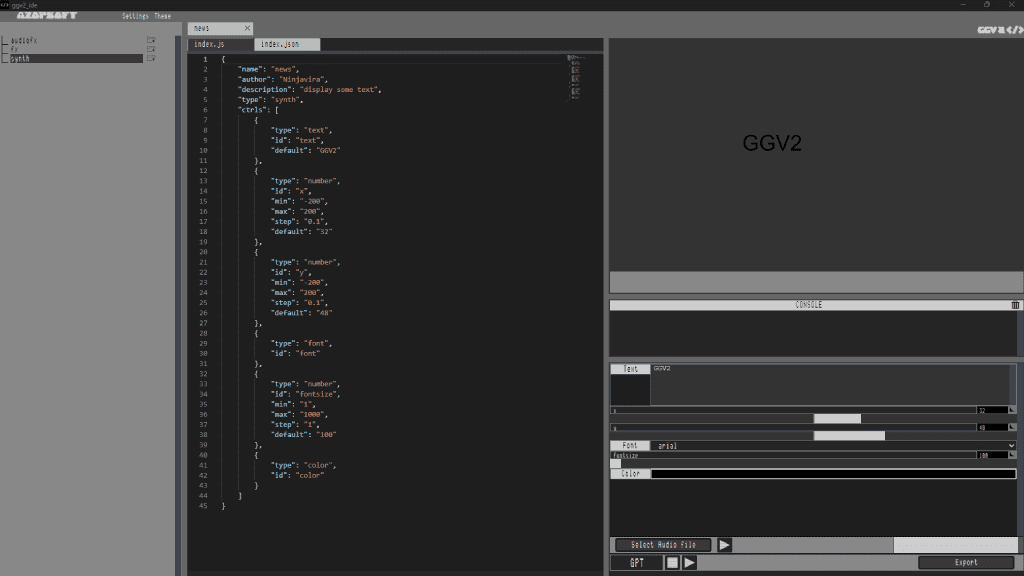
You have a column for the code editor, a window to visualize the result, a console window, a window with controls, a button to import an audio file, a play button, a GPT button to activate AI code autocompletion, a stop button, a play code button, and finally an export button.
Let's take a closer look at the index.js file. You will notice at the top of the page a green commented section that outlines the context, variables, and possible controls for the video synth.
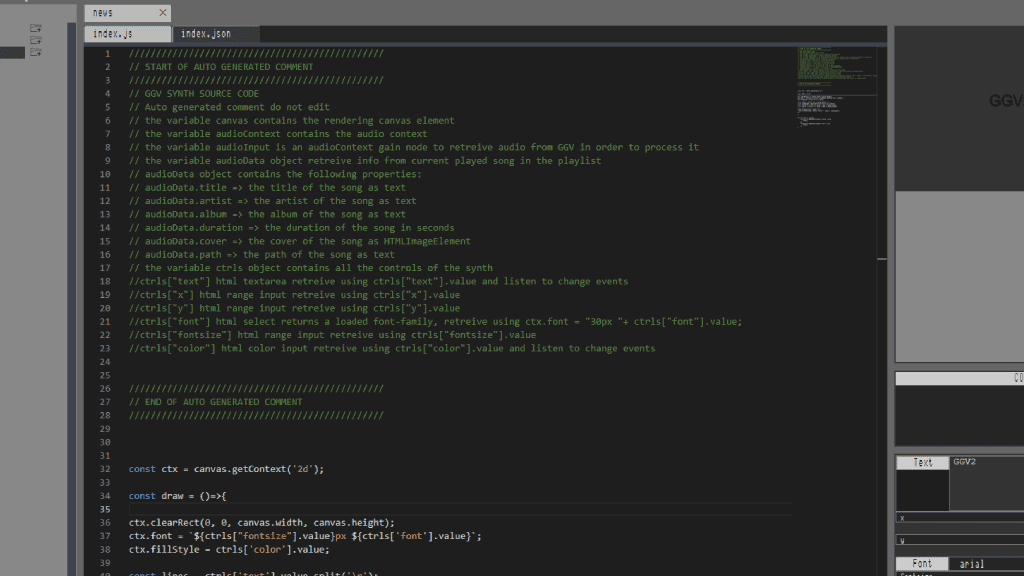
You can run the code by clicking on the play button. You will see the result in the window on the right. You can stop the code by clicking on the stop button.
Click on the tab named index.json. You will see a JSON object with the same structure as the index.js file. This is where you can set up the initial values for the controls. You will see the controls in the window on the right. 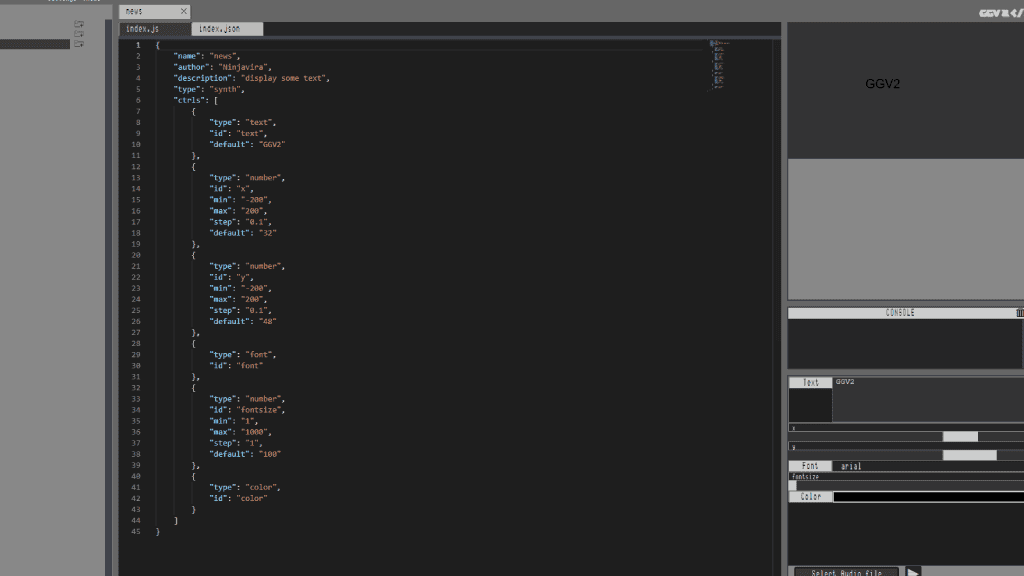
We gonna start coding ouf first video synthetizer. I create a simple canvas animation with 2 controls in Codepen. Codepen template
It is a square that moves randomly, you can control the size and the tint of the square.
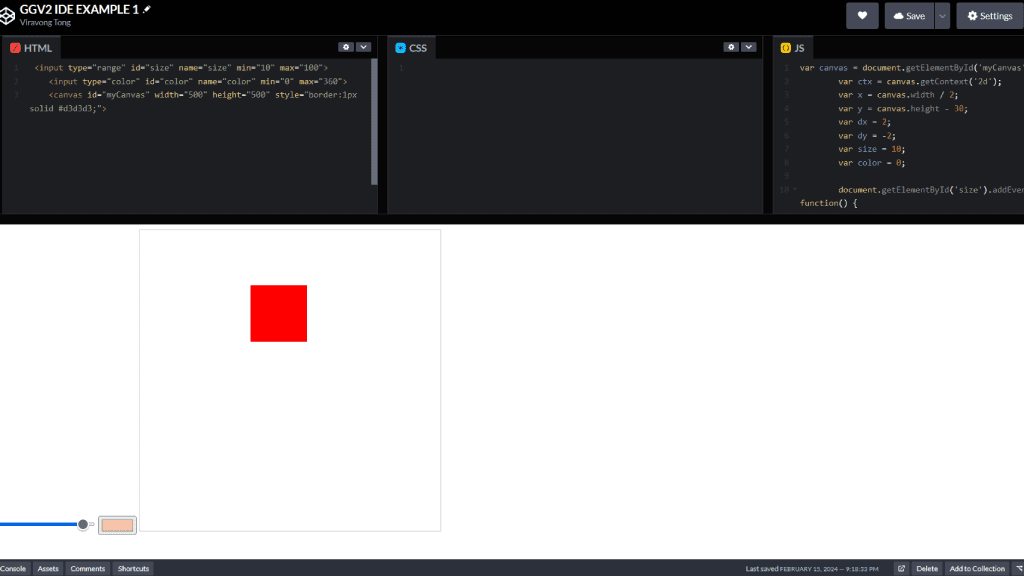
Here is the HTML code.
<input max="100" min="10" name="size" id="size" type="range">

<input name="color" id="color" type="color">

<canvas style="border:1px solid #d3d3d3;" height="500" width="500" id="myCanvas">
Here is the JS code.
var canvas = document.getElementById('myCanvas'); // get the canvas
var ctx = canvas.getContext('2d'); // get the context

var x = canvas.width / 2; // set the initial position of the square
var y = canvas.height - 30; // set the initial position of the square
var dx = 2; // set the speed of the square
var dy = -2; // set the speed of the square
var size = 10; // set the size of the square
 var color = '#000000'; // set the color of the square

// listen to the input of the size control
document.getElementById('size').addEventListener('input', function() {
    size = this.value;
        });
// listen to the input of the color control
document.getElementById('color').addEventListener('input', function() {
    color = this.value;
        });
    // draw the square
    function drawSquare() {
            ctx.clearRect(0, 0, canvas.width, canvas.height); // clear the canvas
            ctx.beginPath(); // draw the square
            ctx.rect(x, y, size, size); // set the color of the square
            ctx.fillStyle = color;  // fill the square
            ctx.fill(); // close the path
            ctx.closePath(); // close the path
        }
    // draw the square and move it
    function draw() {
            drawSquare(); // draw the square
            x += dx; // move the square
            y += dy; // move the square

            // bounce the square
            if(x + dx > canvas.width-size || x + dx < 0) {
                dx = -dx;
            }
            // bounce the square
            if(y + dy > canvas.height-size || y + dy < 0) {
                dy = -dy;
            }
        }
        // call the draw function every 10ms
        setInterval(draw, 10);
Step 5: Import your code
We will modify the JSON file that will represent the controls for your video synth. Here, we only have a fader for the square size and a color picker. You need to change the type from "range" to "number."
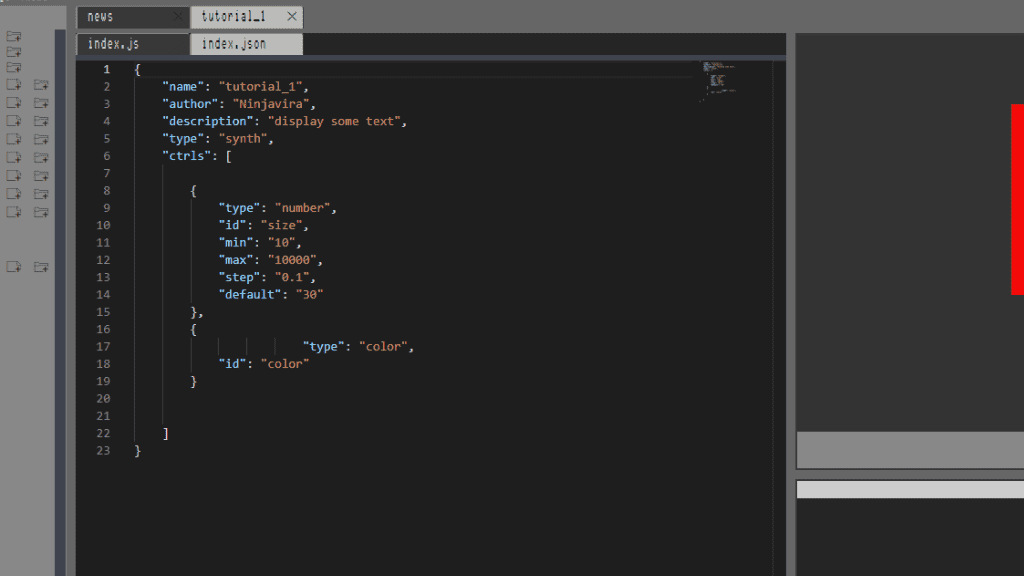
{
 "name": "tutorial_1", // name of the project, no space !
 "author": "Ninjavira", // your name
 "description": "display some text", // a description of your project

"type": "synth", // type of project

 "ctrls": [

        {
            "type": "number", // change the type from "range" to "number"
            "id": "size", // id of the control
            "min": "10", // minimum value
            "max": "10000", // maximum value
            "step": "0.1", // step
            "default": "30" // initial value
        },
        {
            "type": "color", // type of the control
            "id": "color" // id of the control
        }
    ]
}
Now, we will edit the index.js file. There are small differences in the declaration of controls and handling of value changes.
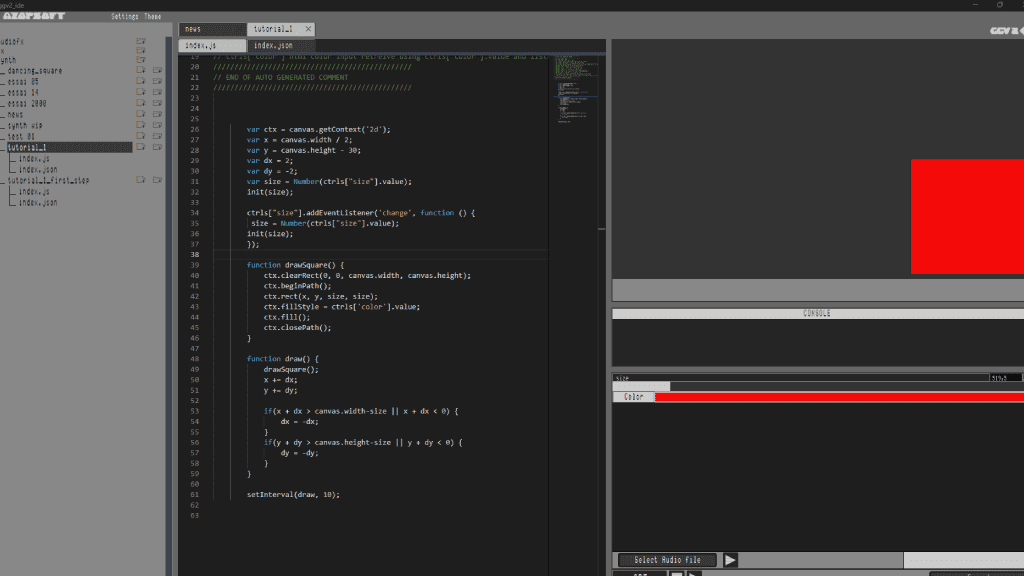
        // we remove the html


        var ctx = canvas.getContext('2d'); // get the context
        var x = canvas.width / 2; // set the initial position of the square
        var y = canvas.height - 30; // set the initial position of the square
        var dx = 2; // set the speed of the square
        var dy = -2; // set the speed of the square
        var size = Number(ctrls["size"].value); // set the size of the square

         init(size); // call the init function with the size value

        // draw the square
        ctrls["size"].addEventListener('change', function () {
            size = Number(ctrls["size"].value);
            init(size);
        });

        // draw the square
        function drawSquare() {
            ctx.clearRect(0, 0, canvas.width, canvas.height); // clear the canvas
            ctx.beginPath(); // draw the square
            ctx.rect(x, y, size, size); // set the color of the square
            ctx.fillStyle = ctrls['color'].value; // fill the square
            ctx.fill(); // close the path
            ctx.closePath(); // close the path
        }

        // draw the square and move it
        function draw() {
            drawSquare(); // draw the square
            x += dx; // move the square
            y += dy; // move the square

            // bounce the square
            if(x + dx > canvas.width-size || x + dx < 0) {
                dx = -dx;
            }
            if(y + dy > canvas.height-size || y + dy < 0) {
                dy = -dy;
            }
        }

        // call the draw function every 10ms
        setInterval(draw, 10);
Step 6: Export your project
Once you have finished coding your video synth, you can export your project by clicking on the export button. You will have a zip file with the index.js, index.json, and the audio files if you have imported some. You can share your project with the community or use it in your own projects.